DIY Dried Orange Slice Garland (With a Toddler Helping)
Slice navel oranges a quarter inch thick, blot both sides dry with paper towels, and bake them at 200 degrees on parchment for four to six hours, flipping every hour, until they're dry and leathery but not browned. Then string them on jute twine, alternating with cinnamon sticks.
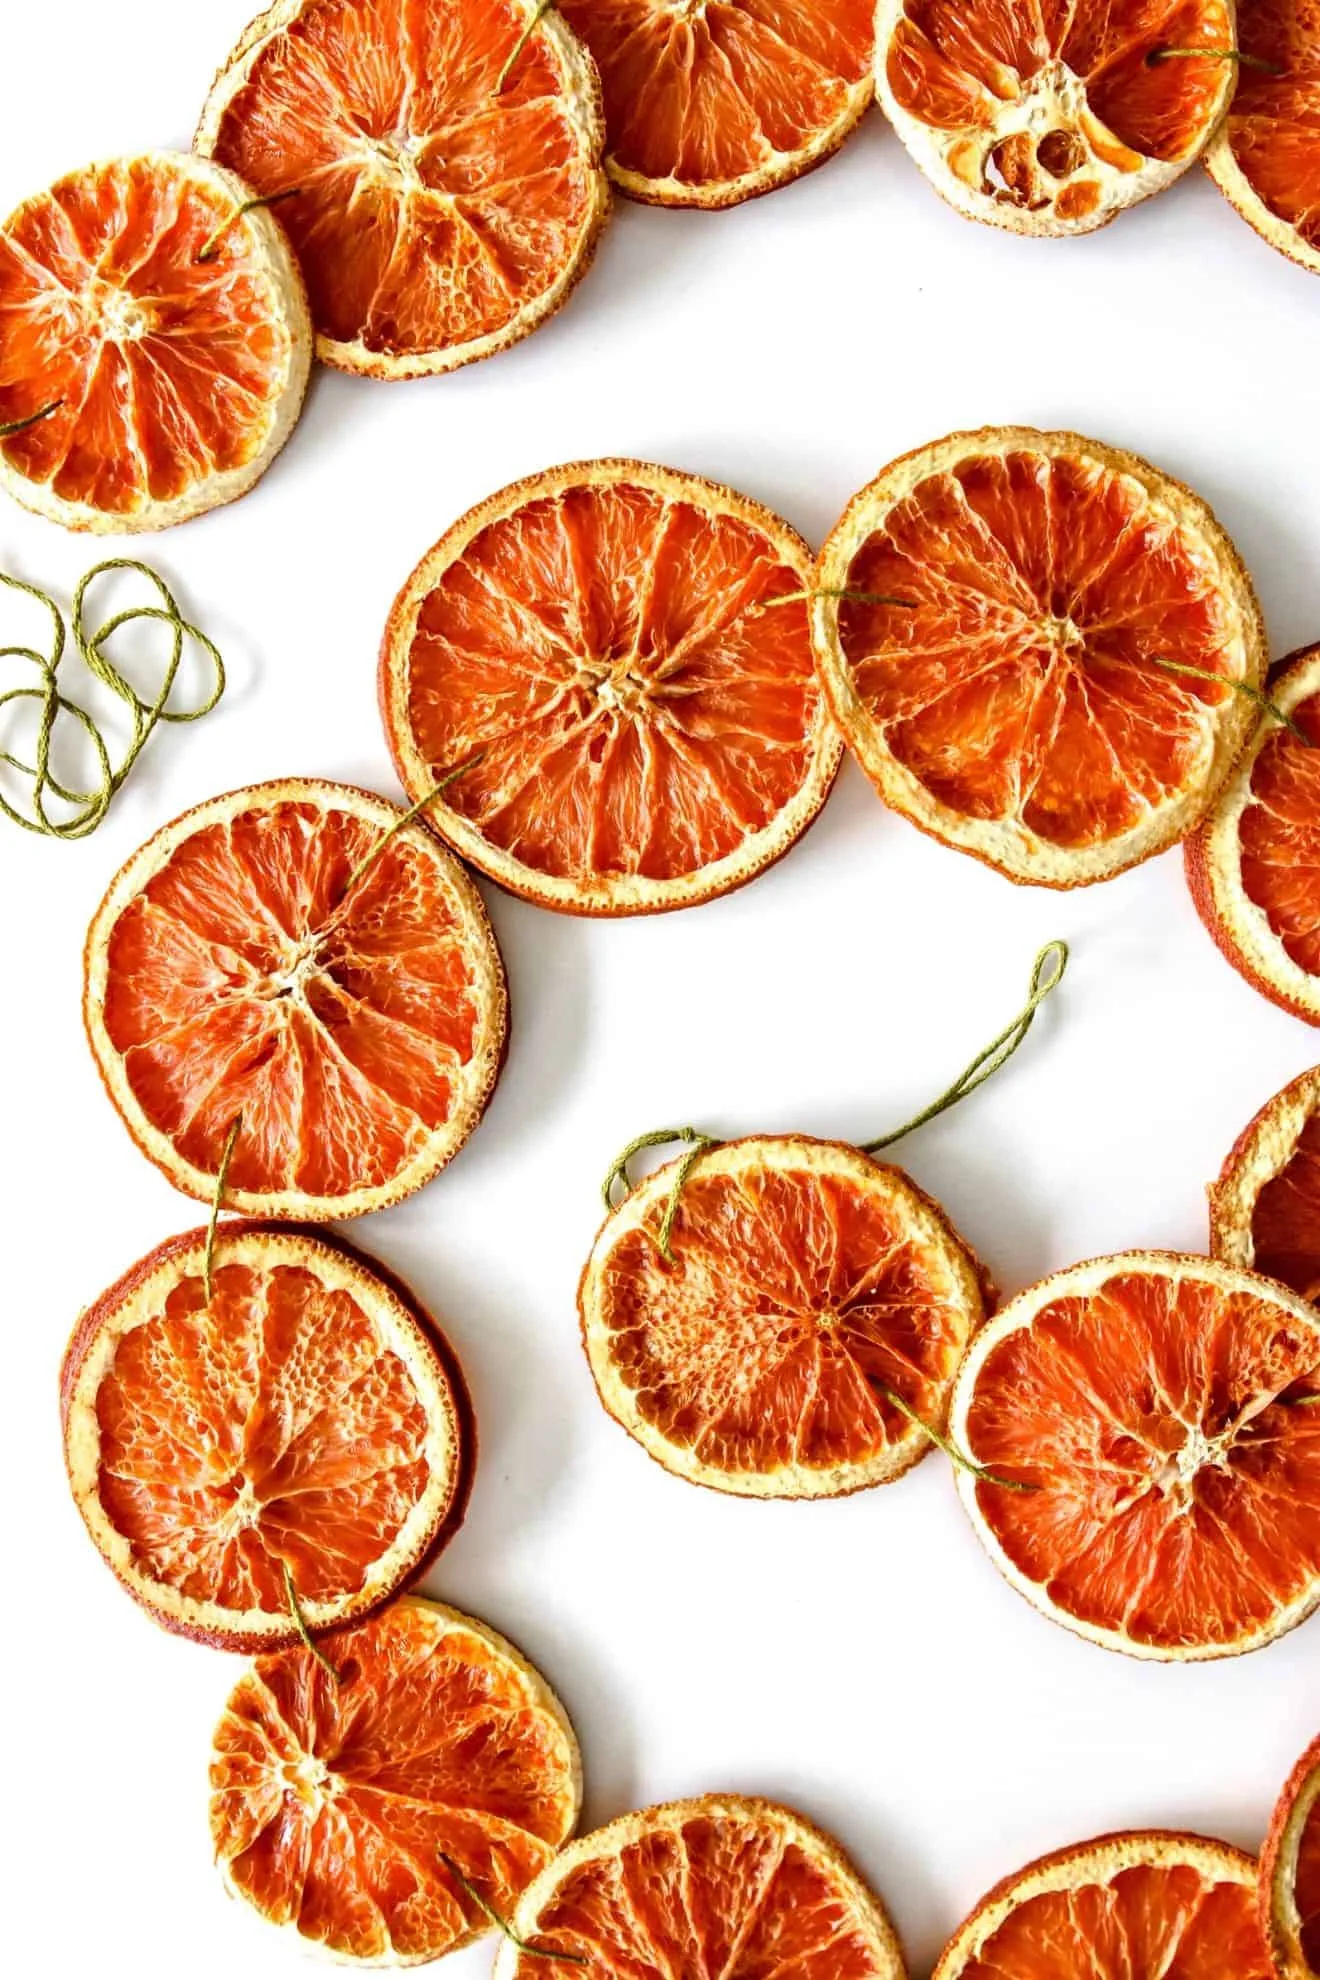
I bought a five pound bag of navel oranges specifically to make this garland and I burned the entire first batch. Every single slice! I had the oven at 250 because I was in a hurry, I walked away to put my daughter down for a nap, and I came back to a tray of little brown leather coasters. Not the glowy stained-glass orange you see everywhere — brown. So I want to save you the four dollars and the three hours, because the second batch came out perfect and I’ve made two more garlands since!
This is honestly one of my favorite Christmas DIYs now, partly because it costs almost nothing and partly because it’s the rare project my two-year-old could actually help with. (She “helped” by eating the ends of every orange I cut. Which counts.)
1. Slice them a quarter inch thick
This is the whole project, right here. A quarter inch! I tried thinner on that first batch and the slices scorched fast and then tore the second I pushed twine through them. Thicker than a quarter inch and you’re looking at seven or eight hours in the oven and a center that never quite dries.
I used a knife the first time and it took me forever to get anything close to even — you really see it once they’re dried, because the thick ones stay pale and the thin ones go dark. So I finally pulled out the Mueller Austria mandoline slicer and it was a completely different experience. Set it, run the orange through, done. Please use the hand guard. I’m serious about that one — the blade on this thing is unreal and I have almost gotten myself twice.
Navel oranges are what I use. They’re big, they’re seedless, and the segments hold together when they dry. Cara caras dry a little pinker if you want a softer color, and I did one string of blood oranges that came out almost burgundy in the light. So pretty!
2. Blot them. Really blot them.
This is the step I see skipped constantly and it’s the difference between four hours and seven. Lay the slices out on paper towels, put another paper towel on top, and press. Then flip them and do it again. You want them to stop looking wet!
All that surface juice has to evaporate before the fruit itself starts drying, so every bit you blot off is time you’re not standing in a warm kitchen in December. (Which, when we lived in Florida, was its own kind of miserable.) My daughter was actually great at this part — patting things is very much her skill set.
3. Pans and parchment
Lay them in a single layer, not touching. If they touch they stick together and you tear one pulling them apart, and then you’re one slice short of a symmetrical garland and it will bother you all season. Y’all know it will!
I use Nordic Ware half sheet pans — they come as a two-pack, they’re made in the USA, and mine have been through years of cookies without warping. Two pans held a whole bag of oranges for me.
Line them with unbleached parchment paper. Not wax paper, not foil. I tried foil once for something else and the sugar welded itself to the pan! The unbleached kind is what I keep on hand because it goes to 425 and I’m not fighting it to lie flat.
If you want to be fancy about it, set a stainless cooling rack on top of the parchment and put the slices on that instead. Air moves underneath, and you can skip the flipping entirely. I didn’t do this the first time and I do it every single time now!
4. 200 degrees, four to six hours, flip every hour
Here’s the actual recipe, and it’s short. Oven at 200. Slices in. Set a timer for one hour, flip everything, set it again. Repeat. Mine were done at four and a half hours, but I’ve had a batch go six when the slices were on the thicker side.
They’re finished when they feel dry and leathery, not tacky, and they don’t leave anything on your fingers. Hold one up to a window — if the center is still dark and dense it needs more time. Any slice that’s soft in the middle is the one that molds on you in January, so when in doubt give it another hour.
Two things that first burnt batch taught me. One, 250 is too hot, at least in my oven. It doesn’t dry faster, it just browns the edges before the middle catches up. Two, prop the oven door open an inch with a wooden spoon. All that moisture has to go somewhere, and if it sits in the oven the slices basically steam. My first non-burnt batch took ages before I figured this out.
Your house is going to smell incredible for two days! That is a real, unadvertised benefit.
5. Or just use a dehydrator (which I caved and bought)
After the third garland I gave in and got a Cosori dehydrator with the stainless steel trays. 135 degrees, eight to ten hours, no flipping, no babysitting, and my oven stayed free for actual dinner. The color comes out brighter too, because nothing ever gets close to browning.
Is it necessary? No! The oven works and the oven is free. But if you’re doing oranges plus apple slices plus anything else, or you’re making garlands as gifts (I did four last year), it earns its counter space fast.
6. Jute twine and cinnamon sticks
Once they’re cool, string them. I use a big-eye needle and go through the white pith just inside the rind, never through the center — the center is thin and it will split.
Natural jute twine is what I like for this. The brown against the orange is exactly the look I was after, it’s stiff enough to push through a needle eye without fraying, and 328 feet is more garland than any normal person needs. (I’m not a normal person about this, so I’ve used most of the roll.)
Between every two or three slices I tie in a cinnamon stick, just a simple knot around the middle so it hangs perpendicular. I used Ceylon cinnamon sticks because I already had them for cocoa and the pale quilled ones look so pretty next to the fruit. Honestly, the cheap thick cassia sticks in the baking aisle work just as well and cost a fraction — grab whatever’s in front of you. Knot the twine on both sides of each stick so nothing slides down and clumps.
Leave about six inches of bare twine at each end for hanging. I didn’t, once, and I restrung the entire thing at 10pm!
7. Hang it where the light comes through
This is the part I wasn’t ready for. I hung the first one on our mantel and it was fine, cute, sure. Then I moved it to the window over the kitchen sink and it stopped being decor and started being the reason I stand at the sink longer than I need to. Afternoon light comes through the slices and the whole thing lights up in these deep amber and red-orange rings, and every slice has a slightly different pattern in it.
So: window. Or across a mirror, or on a tree in front of the lights. Anywhere something glows through it. On a dark wall it just looks like brown circles and all that work disappears!
Mine faded a little by the second season, and a few slices got brittle in storage. I keep them flat in a shoebox with tissue between the layers and I lose maybe two or three a year, which is a good trade for something that cost me one bag of oranges!
If you make one of these, please post it on Instagram and tag me @sugardesignco — I especially want to see them in your windows, because that’s the whole payoff!
-Ciera
Made something with this? Tag me @sugardesignco — I love seeing them.
Questions I get asked
- How thick should you slice oranges for garland?
- A quarter inch. Thinner than that and they scorch and tear when you push a needle through them. Thicker and they take most of a day to dry and stay a little bendy in the middle.
- What temperature do you dry orange slices in the oven?
- 200 degrees for four to six hours, flipping every hour. My oven runs hot, so 200 was the ceiling — my first batch at 250 came out brown around the edges.
- Do dried orange slices last more than one year?
- Mine did, stored flat in a box with tissue paper between the layers. They fade a little each year, but the second season they still glowed in the window just fine.
- Do dried oranges attract bugs?
- Not if they're fully dry. Any slice that's still tacky or soft in the center is the one that molds, so give the soft ones another hour.