Bottle Brush Trees Are the Cheapest Decor Trick I Know
To decorate with bottle brush trees, group them in odd numbers at three clearly different heights, raise the back row on wooden risers or stacked books, tuck a strand of battery fairy lights behind them so you see glow and not bulbs, and lay a snow blanket down last to hide the bases and the battery pack. If the bases are shiny plastic, cover them with white snow texture paste or wrap them in jute twine.
I have a console table behind my couch that defeated me for two whole Decembers. It’s shallow, it’s long, and everything I put on it looked like three unrelated objects having an argument. A candle. A framed photo. A stocking that had nowhere else to go. It never looked decorated, it looked like a surface things had landed on.
What finally fixed it was a bag of bottle brush trees I almost didn’t buy!
I ignored these for years, honestly, because the cheap ones look so cheap in the package. Shiny plastic bases, weirdly bright green, all the exact same height. But I’ve since figured out that almost every problem with a bottle brush tree is fixable in about sixty seconds, and once you have enough of them (that’s the real secret, honestly), they stop being little ornaments and start being a whole scene. It took me three Decembers to land on a system that actually works instead of just lining them up in a sad little row, so here’s mine!
1. Start with a big mixed multipack, not a cute set of three
This is the part people get backwards. A set of three pretty trees costs about the same as a bag of twenty-four plain ones, and the bag is what makes the display work. You need volume. A village needs crowding to read as a village!
I use this 24 piece set of snow frosted sisal trees as my base layer. They come in a few sizes, they’re already dusted with snow so I don’t have to do anything to them, and they sit on little wood bases instead of plastic. (I’ve paid more than that for one single ornament before, so the math on this one still makes me a little irrational.)
If you’d rather have fewer and nicer, this lot of seven cream flocked trees is the one I reach for when I want the vintage look. The cream ones photograph so much better than the green ones, and they’re the ones I leave up into January!
2. Buy three trees that are honestly too tall
Every good bottle brush display has one tree that seems like a mistake. Something that towers over everything else and makes the shelf look intentional instead of scattered.
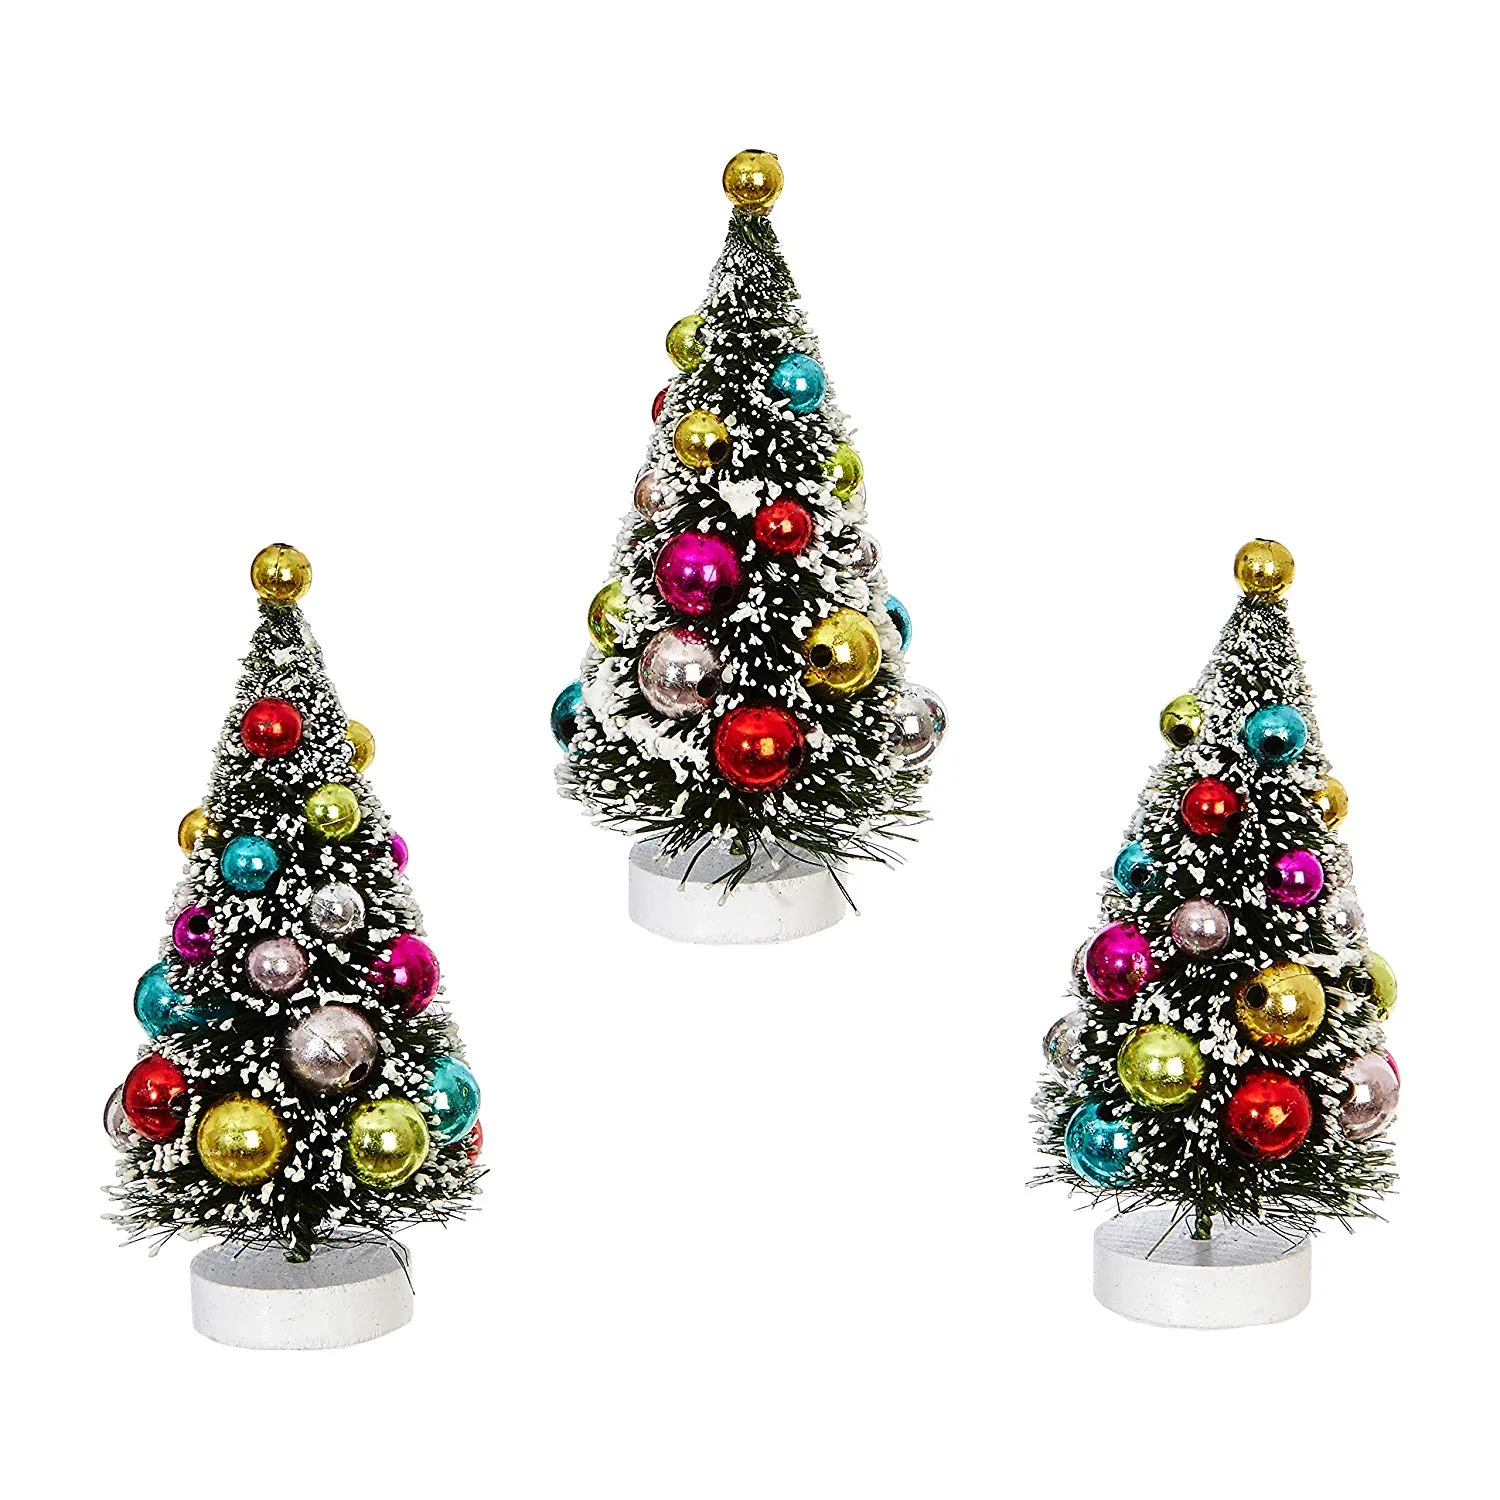
Mine are these little decorated village trees with the tiny glass ball ornaments on them. How cute are those tiny ornaments?! They’re the most expensive thing in my whole village by a lot, and there are only three of them, and they’re the reason the console looks like I planned it. Put your tallest ones slightly off center, never dead center. (Dead center reads as a mantle, not a village. I don’t know why, it just does.)
If you’re shopping in stores, this is where the budget hunting pays off. I’ve found bottle brush trees at Hobby Lobby (wait for the 50% off Christmas decor week, it always comes), in the little dollar section at the front of Target, and honestly the best ones I own came off a thrift store shelf back in Tennessee for a dollar each. Thrifted trees are usually the old ones with the wood bases and the sun faded color, which is exactly the look everybody’s trying to fake now. So if you see a bin of them, grab them!
3. Fix the ugly plastic bases (two ways, both take a minute)
Okay, this is the part I actually wanted to tell y’all about, because it’s the thing that makes cheap trees stop looking cheap.
Option one, snow it. Get a jar of white snow texture paste and dab it over the base with your finger or a cheap craft brush, then carry it up onto the very bottom branches. That last part matters. If you only paint the base it looks painted, but if you drag it up into the branches it reads as a drift the tree is sitting in. It dries in a couple of hours and it’s the same stuff I use on wreaths, so the jar earns its spot!
Option two, wrap it. Take natural jute twine, put a dot of hot glue on the base, wind the twine around and around until the plastic disappears, and glue the tail underneath. It gives you a little woven basket look at the bottom of every tree and I’m obsessed with it. This is my favorite for the green trees because the brown warms them right up.
You do not have to do this to all of them! I only fix the ones in the front row, because nobody is looking at the base of a tree in the back.
4. Get the back row up higher
This is the difference between a village and a lineup. Everything in the back has to sit above everything in the front, or the whole thing flattens out.
I use a set of three wooden risers in 8, 6 and 4 inch heights, staggered across the back of the console. But I’ve also done this with a stack of hardcover books and a shoebox and nobody ever knew, so please don’t buy anything if you have books. (Every year I promise myself I’ll stop hiding cardboard under my decor. Every year the cardboard is there.)
Three heights is the rule. Front, middle, back. If you’re squinting at your shelf and something feels off, it’s almost always that two of your heights are too close together!
5. Tuck the fairy lights behind, never in front
The lights are what make people ask about it. But the mistake is draping them over the trees, which just gives you a shelf full of visible bulbs and one very obvious wire.
I run a strand of battery fairy lights along the back edge of the console, behind the risers, so the light comes through the trees from behind. You see glow and silhouettes instead of dots. These have a remote and a timer, which matters way more than you’d think when the console is behind the couch and you are not about to crawl back there twice a day. Set the timer once in November and forget about it!
If your shelf is long, use the 33 foot strand instead and let it wander through the whole thing. My motto at Christmas is still the brighter the better!
6. Lay the snow down last
Last step, and it hides every sin. I unroll a glittered snow blanket across the console, then set the trees down into it and pinch the edges up around the bases. The bases vanish. The battery pack vanishes. The cord vanishes!
Don’t lay it flat and smooth, by the way. Bunch it. (Real snow drifts, it doesn’t upholster.) For a narrower shelf, the 15 inch village snow roll is the right width and you won’t have to trim anything.
The only arrangement rule I follow
Odd numbers, three heights, and one deliberate gap! The gap is the part people skip. Leave one empty spot in the middle of your village where a candle or a small deer or nothing at all can sit, because a solid wall of trees stops looking like a scene and starts looking like inventory.
My daughter rearranges mine constantly, and here’s the thing, it always looks fine! That’s really the whole argument for bottle brush trees. There’s no fragile glass, no correct answer, and if the entire village has migrated into one corner of the console by December 10th (it will), you just push them back with your hand.
If you build a little village on your console or your shelf, please post it on instagram and tag me @sugardesignco so I can see it! I want to see the thrifted ones especially.
-Ciera
Made something with this? Tag me @sugardesignco — I love seeing them.
Questions I get asked
- How many bottle brush trees do I need for a console table?
- For a four foot console I use somewhere between nine and thirteen trees, in odd numbers, at three clearly different heights. That sounds like a lot but most of them are under three inches tall.
- How do you fix the ugly plastic bases on cheap bottle brush trees?
- Dab white snow texture paste over the base and up onto the bottom branches so it reads as a drift, or wrap the base in jute twine and hot glue the end underneath. Both take about a minute per tree and both cost less than buying nicer trees.
- Where do you put the fairy lights?
- Behind the trees, never in front. Push the strand back until you're seeing glow through the branches instead of individual bulbs, and hide the battery pack under the snow blanket.
- Can bottle brush trees stay up after Christmas?
- The cream and white ones can. I pull out anything red or gold after New Year's and leave the plain snowy trees on the shelf through most of January, when the house feels bare otherwise.